

I recently had the pleasure of setting up a new project, Freelance Parlance, on a local WordPress, Gatsby, and Tailwind CSS setup. The Gatsby generated static pages are then pushed to Github and deployed via Netlify's free plan... No database management, no EC2 to setup, no Docker files. Just fast, responsive and interactive web pages, and you can do it too.
The Why
Before we start on the how, let's talk about why I decided to go with this particular stack. Because it is not for everyone. Here's what I needed:
- A simple CMS back-end to handle blogging needs, Freelance Parlance needs a blog but I do not want to manage yet another server. This should also be both scalable and free.
- A pain free integration with React for interactive front-end elements. Despite Rails latest built in Webpack integrations, setting up Rails + React for Kata Club still took longer than expected, and it did not have built in hot loading.
- Server-side rendering(SSR) of React components, ideally as easy to setup as possible.
- Full control over the look and feel of the site, and zero lines of PHP.
And here are some additional benefits I get from this setup:
- I'm only running WordPress locally, no need to configure production databases.
- Rich WordPress CMS data schema and plugin ecosystem, but without the security updates.
- Static pages that are cheap and easy to scale.
And a brief overview of the key software components:
WordPress
WordPress is the world's most popular Content Management System (CSM). As a mature CMS WordPress has both a butter smooth editor and built in support for SEO, assets, and all the other features you definitely don't want to build from scratch :). It gets hated-on by the same "cool kids" who hate Microsoft Excel, never-mind that they are both extremely popular because they work well. It is estimated that WordPress serves 40 percent of total web pages worldwide, and it has the rich plugin ecosystem to match.
Gatsby
Gatsby is a front-end framework and static site generator, it integrates nicely with most GraphQL back-ends and automatically generates static pages. Gatsby is React based and has a large components and plugin library also. It's fast, it's in JavaScript, and it is straightforward to setup. The only close competitor I can think of is Next.js, which I also hear great things about, but for this project I stuck with Gatsby.
Tailwind CSS
Tailwind is probably my new favorite CSS framework. It took me a long while to get used to the idea that inline CSS is not a sign of the apocalypse. But if inline CSS is kosher, there's no reason not to use a concise CSS utility framework like Tailwind. Yes Tailwind lead to long React class names, but it's still much more concise than writing out the entire style ala Styled Components.
Install WordPress
Before we get started installing WordPress locally, a note of caution on your PHP and WordPress versions. We will be using two WordPress Plugins to connect our local WordPress to Gatsby, WPGatsby and WPGraphQL, and you should make a note of their currently supported PHP and WordPress versions. This is so you wouldn't have to reinstall PHP and WordPress multiple times :).
In my case with Ubuntu 18.04, I had to add the ondrej/php and ondrej/apache2 repos to get the right versions of Apache server and php.
sudo apt-add-repository ppa:ondrej/php or sudo apt-add-repository ppa:ondrej/apache2
After that you can install WordPress, PHP, libapache2-mod-php, mysql-server, and php-mysql:
sudo apt update
sudo apt install wordpress php libapache2-mod-php mysql-server php-mysql
Afterwards, check your PHP version, your MySQL versions to make sure they are at or above the plugin requirements. In my case I also had to install libapache2-mod-dnssd and libapache2-mod-wsgi. And if you have multiple versions of libapache2-mod-php installed, you'll need to enable the versions you want (in my case 8.0), check configurations, and restart Apache.
sudo a2enmod php8.0
sudo a2enmod wordpress
sudo a2enmod rewrite
sudo apache2ctl configtest
sudo service apache2 restart
We are half way there, now we need to log into MySQL, setup a database for WordPress and create a user used by WordPress to access the database:
sudo mysql -u root
CREATE DATABASE wordpress;
GRANT ALL ON wordpress.* TO 'wordpress'@'localhost' IDENTIFIED BY 'password';
FLUSH PRIVILEGES;
exit
Feel free to change the username, password and database names, although it does not matter much since we are not exposing our database to the outside world.
Next we'll setup our database connection information for our WordPress site at /etc/wordpress/config-localhost.php with the following config file (you can also skip this part and follow the WordPress Installation Guide next:
<?php
define('DB_NAME', 'wordpress');
define('DB_USER', 'wordpress');
define('DB_PASSWORD', 'password');
define('DB_HOST', 'localhost');
define('DB_COLLATE', 'utf8_general_ci');
define('WP_CONTENT_DIR', '/usr/share/wordpress/wp-content');
?>
Next, we'll configure Apache2 to serve the WordPress we just installed under /usr/share/wordpress by adding the following to the file /etc/apache2/sites-available/wordpress.conf and restarting the apache2 service (sudo service apache2 restart). You can change /blog on line 1 into some other route such as /wordpress
Alias /blog /usr/share/wordpress
<Directory /usr/share/wordpress>
    Options FollowSymLinks
    AllowOverride All
    Order allow,deny
    Allow from all
</Directory>
<Directory /usr/share/wordpress/wp-content>
    Options FollowSymLinks
    Order allow,deny
    Allow from all
</Directory>
With WordPress all configured, you should be able to finish setup at http://localhost/blog
After initial WordPress user setup is complete, go to http://localhost/blog/wp-admin/plugins.php and install the two plugins mentioned above: WP Gatsby and WP GraphQL. If you ran into issues with the plugin install, it is possible that you have to modify your wp-config file and add the line define('FS_METHOD', 'direct') and change owner/mod of your wp-content/plugs and wp-content directories.
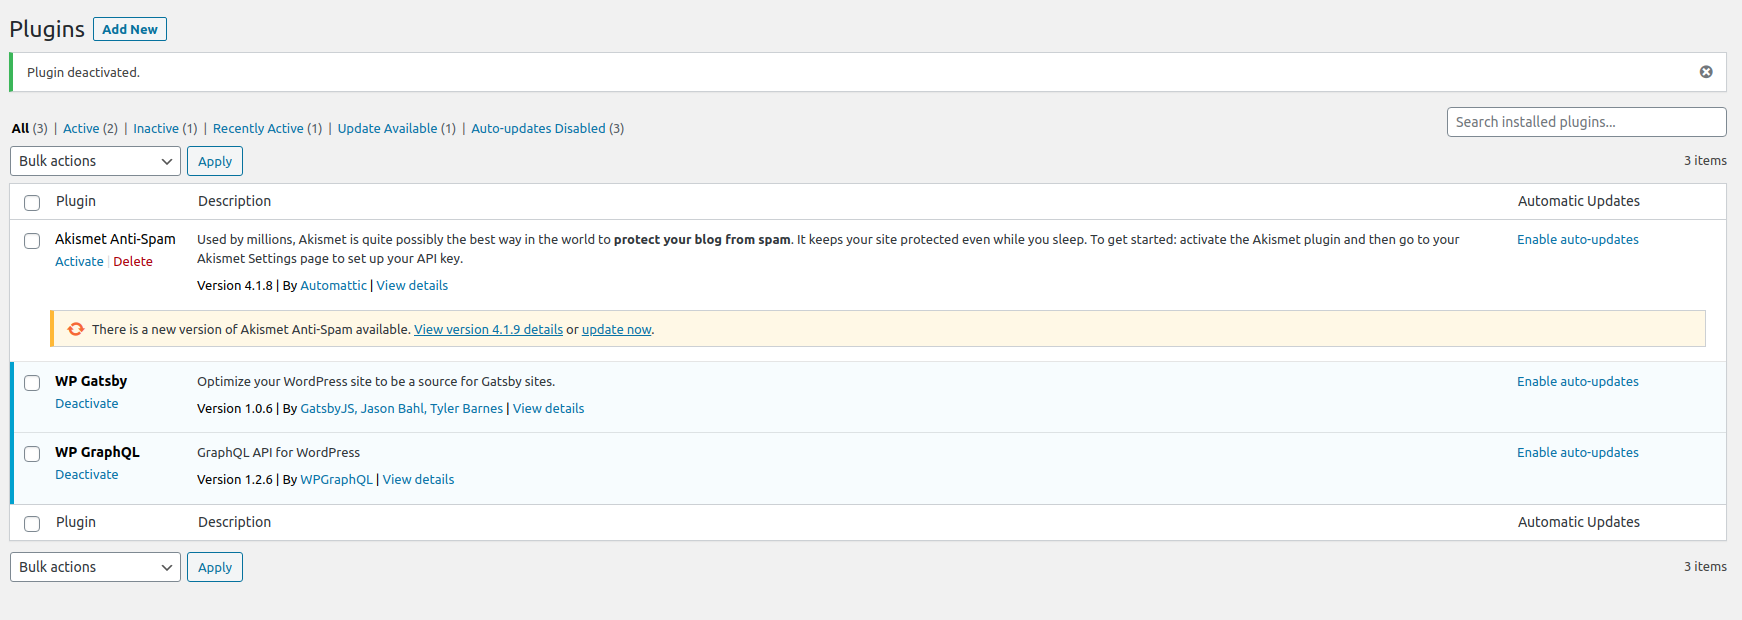
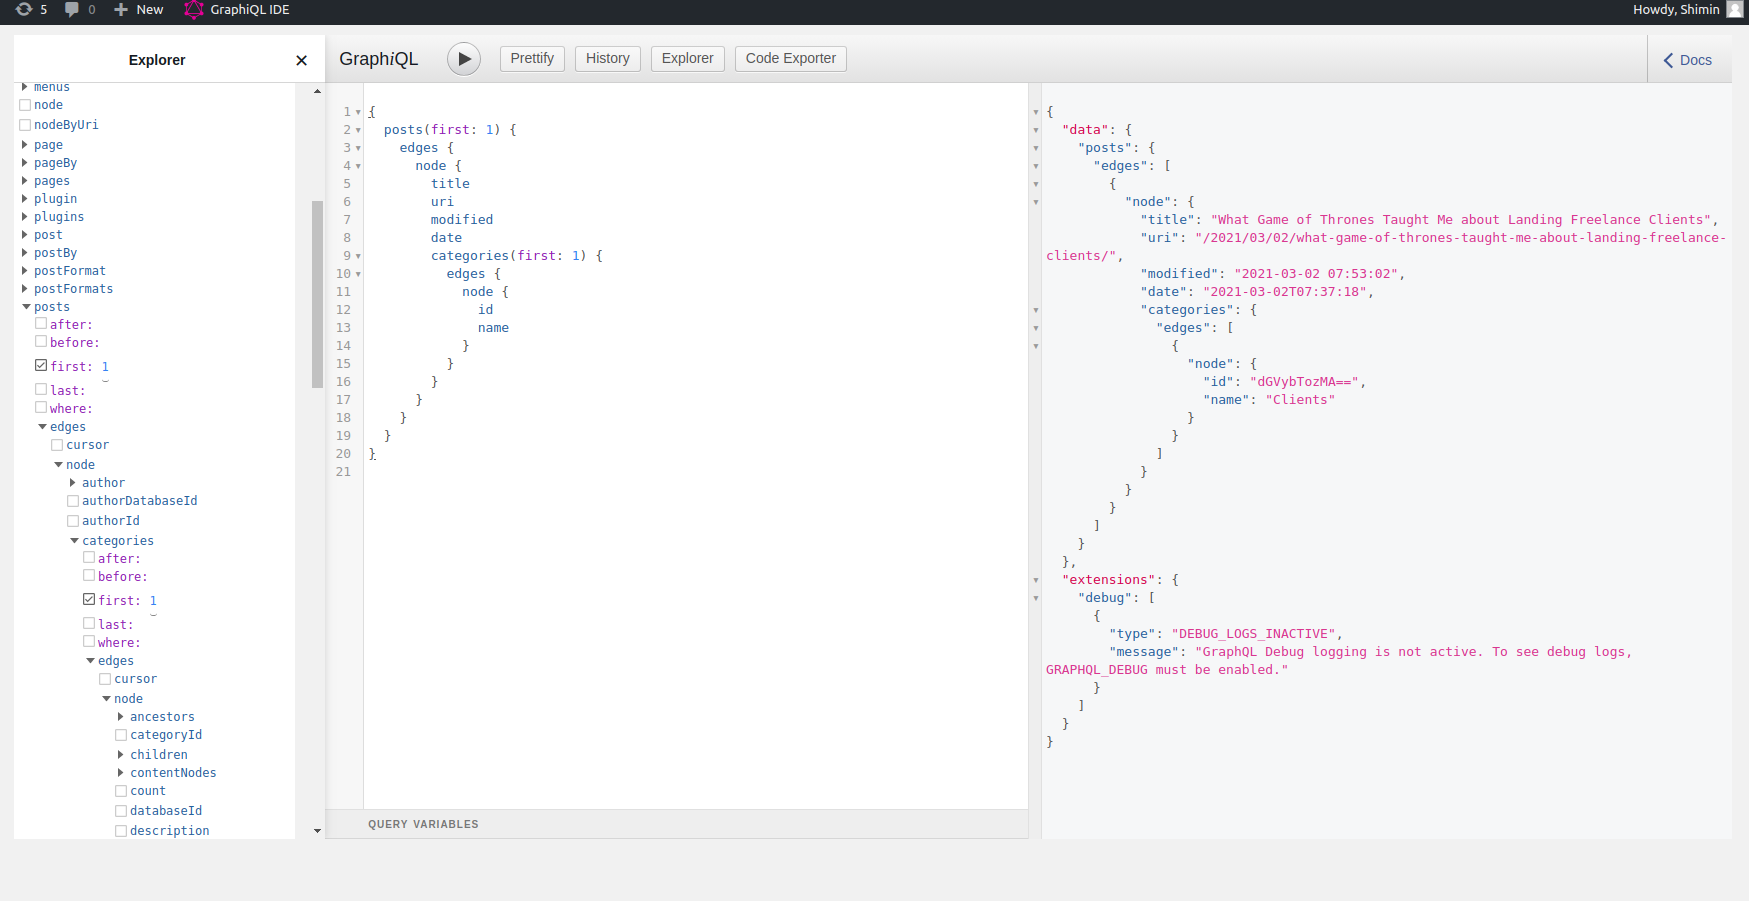
Once the plugins are installed, you will be able to see a GraphiQL IDE on the top bar of our admin page, which provides you with the GraphiQL dev environment for your WordPress content.
With our headless back-end headless CMS setup, we are ready to move on to the next section. In Part 2 we will install and setup Gatsby, connect it to WordPress via GraphQL, and style our home page via Tailwind CSS.
Happy Coding!