

At the beginning of the last post, we have a local instance of WordPress setup at http://localhost/blog and our WordPress GraphiQL IDE at http://localhost/blog/wp-admin/admin.php?page=graphiql-ide. This post will cover the installation of Gatsby.js, connecting it to our WordPress instance and deploying it via Netlify.
Install Gatsby.js
First off, make sure you have node is installed for your local machine, and if you have a particular version of node.js you want to use, install nvm and switch to the version you'd like to use. Use which npm to check which version of node.js you are currently running.
npm install -g gatsby-cli
One thing I really like about Gatsby is its cli (command line interface) setups, so let's go ahead and use it to create our new Gatsby setup. Simply type the command gatsby new after installation and a setup wizard will help you setup your initial site. I'm going to call my new Gatsby project MyHeadlessWordPress and save it in blog/my-headless-wordpress. I'm also going to select WordPress during the CMS prompt and since there's no Tailwind selection for styling system, ill skip that step.
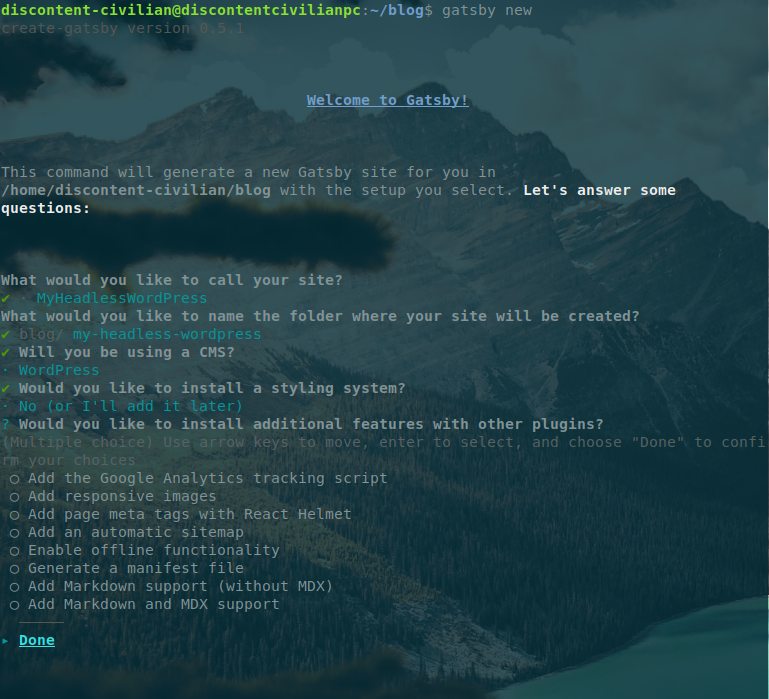
Lastly, the setup will as you for the WordPress GraphQL endpoint, which if you go to the Graphql admin you'll find it to be the first item on the page. If you've followed along this tutorial so far it'll be http://localhost/blog/graphql. One final confirmation and our initial setup is complete.
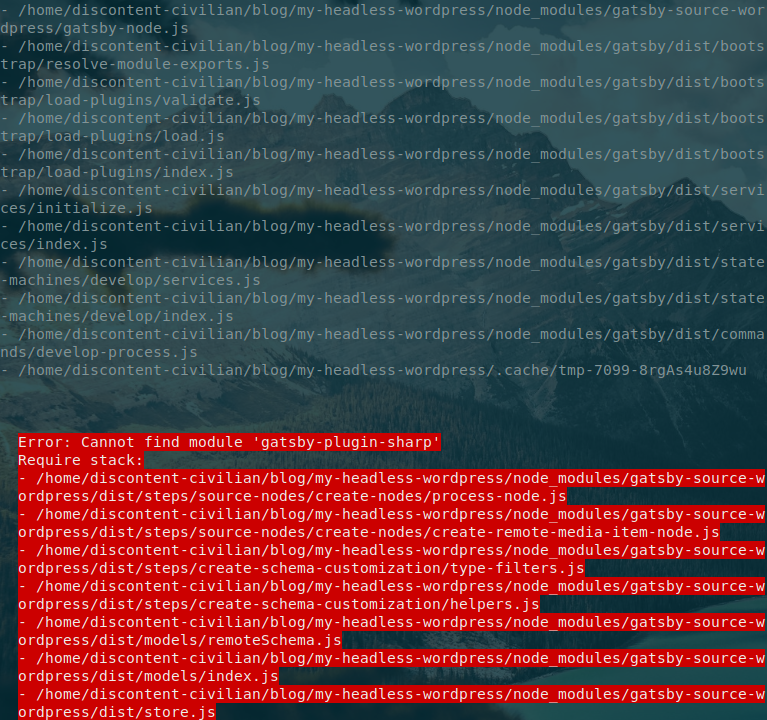
After cd my-headless-wordpress, running gatsby develop should bring up the site, but in case it does not, you can install any missing modules manually. In my case, gatsby-plugin-sharp, was not installed with the cli so I had to install manaully via npm install gatsby-plugin-sharp and adding it to the plugin array in gatsby-config.js
At this point, I'm able to see the welcome screen at http://localhost:8000/ and my gatsby-config.js looks like this:
module.exports = {
  siteMetadata: {
    title: "MyHeadlessWordPress",
  },
  plugins: [
    {
      resolve: "gatsby-source-wordpress",
      options: {
        url: "http://localhost/blog/graphql",
      },
    },
    "gatsby-plugin-sharp",
  ],
};
Check to make sure your WordPress connection is working by going to http://localhost:8000/__graphql and try the below query to make sure your WordPress posts show up (make sure you have a least one post in WordPress):
{
  allWpPost {
    edges {
      node {
        id
      }
    }
  }
}
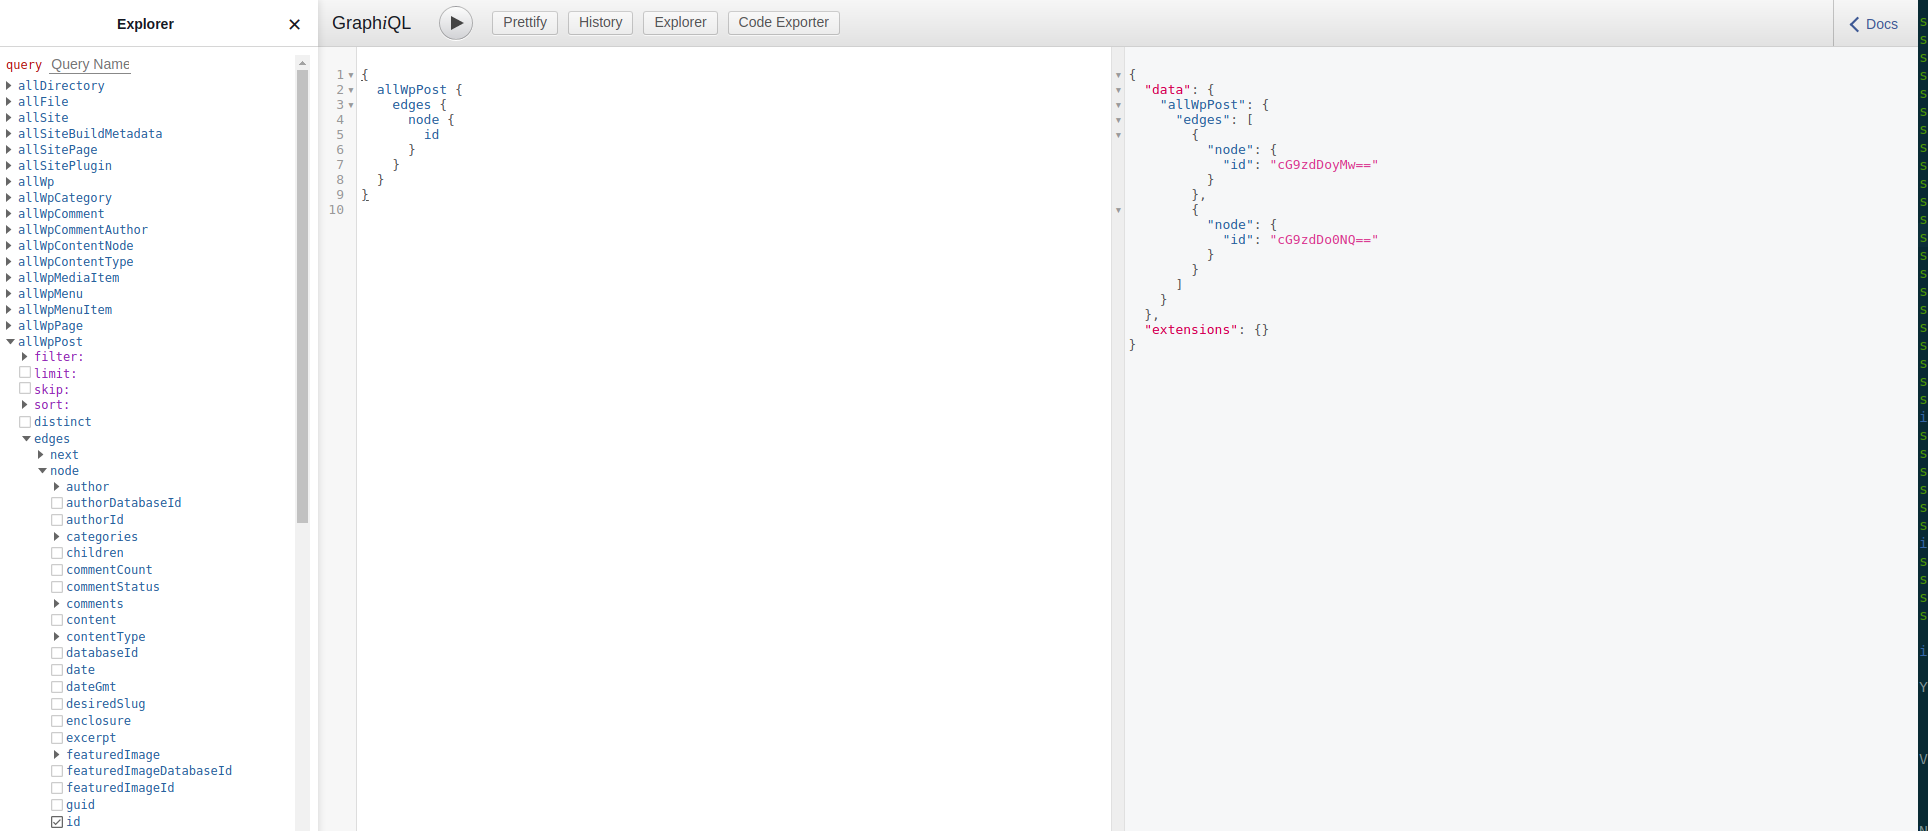
If your post shows up, congrats! you now have a working connection between WordPress and Gatsby, now let's setup a page to display our beautiful post contents.
Update Home Page
First things first, let's update src/pages/index.js with a list of our WordPress posts:
import React from "react"
import { Link, graphql } from "gatsby"
import Layout from "../components/layout"
import PostSummary from "../components/post-summary"

export default function Home({ data }) {
  return (
    <Layout>
      <section className="">
        <div className="">
          <h4 className="">Posts:</h4>
          { data.allWpPost.edges.map( ({ node }) => (
              <PostSummary post={node} />
            ))}
        </div>
      </section>
    </Layout>
  );
}

export const pageQuery = graphql`
  query {
    allWpPost(sort: { fields: [modified], order: [DESC] }) {
      edges {
        node {
          title
          excerpt
          slug
          modified(formatString: "MMMM DD, YYYY")
          categories {
            nodes {
              name
            }
          }
        }
      }
    }
  }
`
And we'll add a post-summary component file under src/components/post-sumnmary.js
import React from "react"
import { Link } from "gatsby"

export default function PostSummary({ post }) {
  const title = post.title;
  const slug = post.slug;
  const excerpt = post.excerpt;

  return (
    <div>
      <p>{title}</p>
      <p>{excerpt}</p>
      <Link to={slug}> Go </Link>
    </div>
  );
}
While post summary is simply a regular functional React Component, let's talk a little bit about the graphql method on index.js. Gatsby is designed to create both server side rendering and static page generation, so during development the query will fetch from our WordPress GraphQL instance and pass the return data into our component as its props (the data key is a GraphQL keyword and not a Gatsby construct. Gatsby will also fetch the data using GraphQL during build time and use the return data to generate the static pages, so we do not need to have a WordPress instance up at all after our build is complete!
Your home page may look something like this right now:

Adding Tailwind CSS
While we are functionally pulling data from WordPress now, our site is missing sizzle. Let's setup Tailwind CSS to make things pretty. We'll install Tailwind with Postcss:
Install Tailwind, create tailwind.config.js and setup postcss for Gatsby.
npm install tailwindcss
npx tailwindcss init
npm install postcss gatsby-plugin-postcss
Add the line gatsby-plugin-postcss underneath gatsby-plugin-sharp from the installation step. My updated gatsby-config.js:
module.exports = {
  siteMetadata: {
    title: "MyHeadlessWordPress",
  },
  plugins: [
    {
      resolve: "gatsby-source-wordpress",
      options: {
        url: "http://localhost/blog/graphql",
      },
    },
    "gatsby-plugin-sharp",
    "gatsby-plugin-postcss"
  ],
};
Also create a postcss.config.js file at the root of the project that includes the TailwindCSS plugin:
module.exports = {
  plugins: {
    tailwindcss: {},
    autoprefixer: {},
  },
}
We'll also add a global css file at src/styles/global.css with the @tailwind directive components:
@tailwind base;
@tailwind components;
@tailwind utilities;
and lastly, import our latest css files into Gatsby via ./gatsby-browser.js:
import './src/styles/global.css';

It may not look like much, but the Tailwind preset is now applied to our homepage. Let's change up our index.js and `post-summary.js` to add some style courtesy of Tailwind UI :
# Index.js
export default function Home({ data }) {
  return (
    <Layout>
      <section class="py-12 bg-white">
        <div class="max-w-7xl mx-auto px-4 sm:px-6 lg:px-8">
          <div class="lg:text-center">
            <h2 class="text-base text-4xl text-indigo-600 font-semibold tracking-wide uppercase">
              Posts:
            </h2>
            { data.allWpPost.edges.map( ({ node }) => (
                <PostSummary post={node} />
              ))}
          </div>
        </div>
      </section>
    </Layout>
  );
}
# post-summary.js
return (
<>
  <p class="mt-2 text-2xl leading-8 font-extrabold tracking-tight text-gray-900 sm:text-2xl">
    {title}
  </p>
  <p class="mt-4 max-w-xl text-xl text-gray-500 lg:mx-auto">
    {excerpt}
  </p>
  <Link className="w-1/5 mt-3 mx-auto flex items-center justify-center px-2 py-2 border border-transparent text-base font-medium rounded-md text-white bg-indigo-600 hover:bg-indigo-700 md:py-2 md:text-lg md:px-2"
  to={slug}> Read More </Link>
</>
);
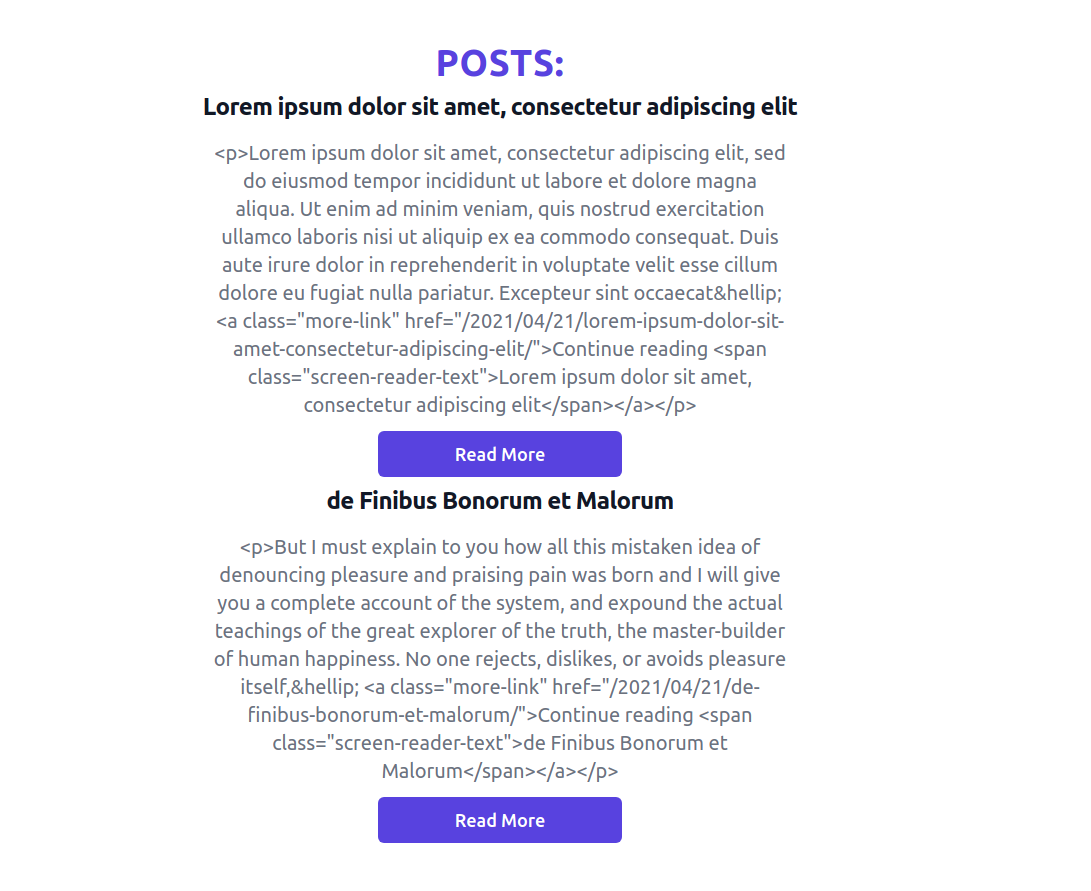
Looking more stylish already! But what's what the ugly HTML text file in the middle of the posts? For the next part of the series, we'll parse the string html content coming from WordPress, setup individual blog posts and deploy our new Gatsby blog via Netifly to the internet.
To recap, we now have a local WordPress installation, a newly created Gatsby app capable of pulling data from WordPress in a headless CMS setup. We also installed Tailwind CSS and used it to style our new blogging app. You can also checkout the repo for the example Gatsby site used in these blogs posts here.
Happy Coding!